Hardwood Floor Nailer: The Ultimate Tool for Flawless Flooring Installation
In the realm of flooring installation, a tool that stands as a game-changer is the indispensable hardwood floor nailer. This precision instrument has revolutionized the way hardwood floors are installed, offering efficiency, accuracy, and a flawless finish. In this article, we’ll delve into the world of hardwood floor nailers, exploring their purpose, types, usage techniques, and how they ensure a seamless installation process for your hardwood flooring project.
The Essence of a Hardwood Floor Nailer: Precision and Performance
A hardwood floor nailer is a specialized tool designed to securely fasten hardwood flooring to subfloors. It delivers nails with precision, ensuring a snug fit without damaging the delicate hardwood planks. The term “nailer” aptly describes its function, as it effectively and efficiently drives nails into the wood, resulting in a sturdy and visually appealing floor.
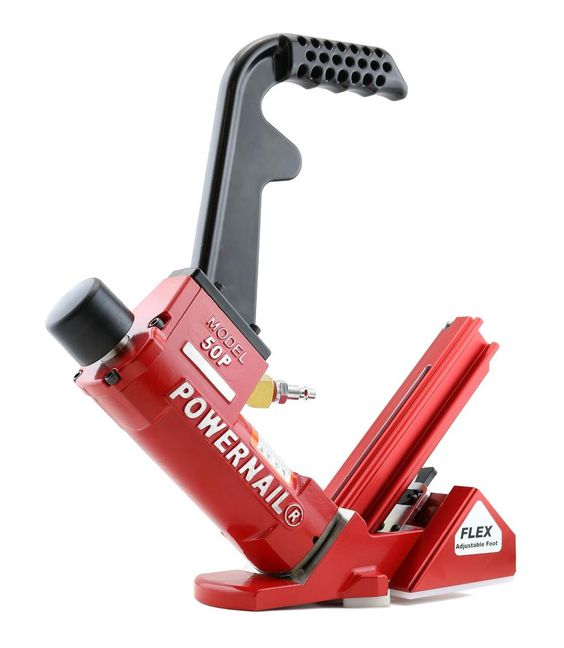
Types of Hardwood Floor Nailers: Tailored to the Task
Hardwood floor nailers come in various types, each designed to cater to specific installation methods:
- Pneumatic Nailers: These nailers utilize air pressure to drive nails into the wood. They offer speed and power, making them ideal for large-scale installations.
- Manual Nailers: Also known as “manual nail guns” or “manual cleat nailers,” these tools require physical force to drive nails. They are versatile and suitable for both DIYers and professionals.

Usage Technique: Achieving Professional Results
Using a hardwood floor nailer requires attention to detail and adherence to proper techniques. Here’s a step-by-step guide to using a pneumatic hardwood floor nailer:
- Prep the Subfloor: Ensure the subfloor is clean, dry, and free of debris. Lay down a moisture barrier if necessary.
- Acclimate the Wood: Allow the hardwood planks to acclimate to the room’s humidity and temperature for a few days before installation.
- Position the Nailer: Set the nailer’s depth adjustment to match the thickness of your hardwood planks. Position the nailer at a 45-degree angle to the plank’s tongue.
- Align and Nail: Place the nailer’s nose over the tongue of the plank. Apply consistent pressure and engage the nailer’s trigger to drive the nail into the wood.
- Spacing and Pattern: Follow the manufacturer’s guidelines for nail spacing and pattern. Typically, nails are placed at regular intervals along the length of the plank.
- Continue Installation: Continue installing planks row by row, ensuring each plank is snugly fit against the previous one.
- Manual Nailing: If using a manual nailer, strike the nailer’s head with a mallet to drive the nail. Ensure even pressure to prevent damage to the wood.
Benefits of Using a Hardwood Floor Nailer: Precision and Efficiency
Using a hardwood floor nailer offers a range of benefits for your flooring installation project:
- Precision: Hardwood floor nailers drive nails at consistent depths, ensuring a professional and polished finish.
- Efficiency: The nailer’s pneumatic power or manual operation speeds up the installation process.
- Reduced Damage: Proper nail placement minimizes the risk of damaging delicate hardwood planks.
Elevate Your Flooring Project with a Hardwood Floor Nailer
A hardwood floor nailer is more than just a tool—it’s a key player in achieving a flawless and durable hardwood flooring installation. Whether you’re a professional installer or a DIY enthusiast, this precision instrument empowers you to create a stunning and sturdy floor with ease. By understanding the types, proper usage techniques, and the benefits of a hardwood floor nailer, you can elevate your flooring project to new levels of efficiency and excellence.