Flooring Nailer: The Ultimate Tool for Precise and Efficient Installation
In the realm of construction and renovation, a tool that stands as an essential for precise and efficient flooring installation is the versatile flooring nailer. This specialized instrument has redefined the way flooring projects are undertaken, offering accuracy, speed, and a flawless finish. In this article, we’ll delve into the world of flooring nailers, exploring their purpose, types, usage techniques, and how they play a pivotal role in ensuring a seamless and durable flooring installation process.
The Essence of a Flooring Nailer: Elevating Installation Excellence
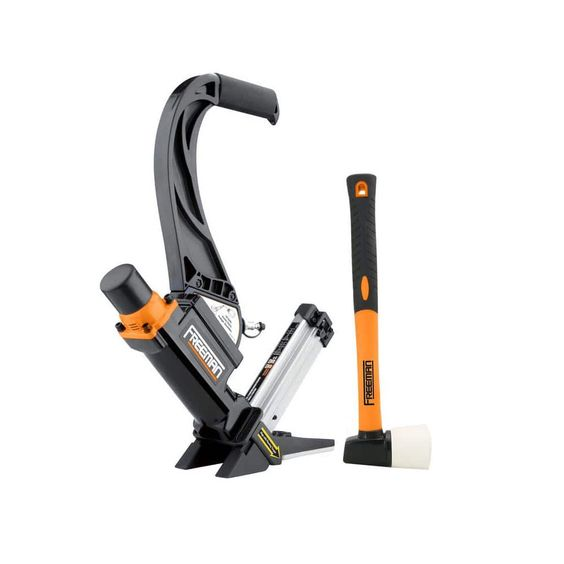
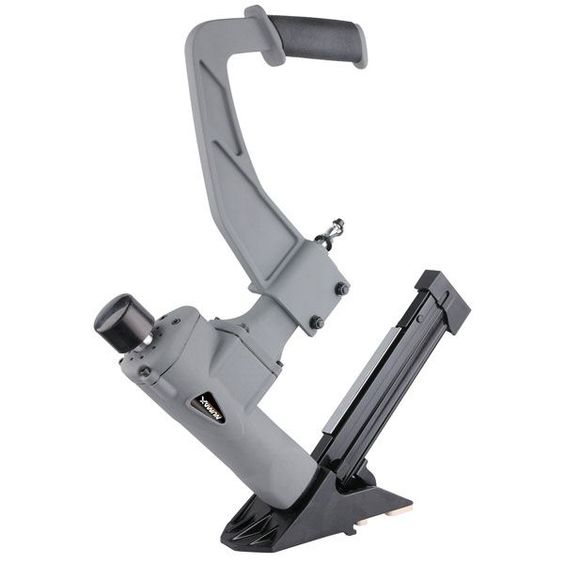
A flooring nailer is a dedicated tool designed to secure flooring materials—such as hardwood, engineered wood, laminate, or even bamboo—onto subfloors. Its primary function is to drive nails or staples at precise angles and depths, ensuring a snug fit without causing any damage to the surface of the flooring material. The term “flooring nailer” aptly captures its significance, as it is specifically engineered to facilitate smooth and efficient flooring installation.
Types of Flooring Nailers: Tailored to Flooring Types
Flooring nailers come in various types, each catering to specific flooring materials and installation methods:
- Pneumatic Flooring Nailers: These nailers utilize air pressure to drive nails or staples into the flooring material. They offer speed and power, making them ideal for larger-scale installations.
- Manual Flooring Nailers: Also known as “manual nail guns” or “manual flooring nailers,” these tools require physical force to drive nails. They are versatile and suitable for both DIY enthusiasts and professionals.
Usage Technique: Achieving Precision and Speed
Using a flooring nailer requires precision and adherence to proper techniques. Here’s a step-by-step guide to using a pneumatic flooring nailer for hardwood flooring installation:
- Prepare the Subfloor: Ensure that the subfloor is clean, level, and free of debris before starting the installation process.
- Acclimate the Flooring Material: Allow the flooring material to acclimate to the room’s humidity and temperature for a few days before installation.
- Position the Nailer: Set the nailer’s depth adjustment to match the thickness of your flooring material. Hold the nailer at a slight angle to the material.
- Nail Placement: Place the nailer’s nose on the edge of the flooring material, near the tongue or groove, depending on the manufacturer’s guidelines.
- Engage the Trigger: Firmly press the nailer’s trigger to drive a nail or staple into the flooring material. The nail should be driven at a precise angle to ensure a secure fit.
- Spacing and Pattern: Follow the manufacturer’s recommendations for nail spacing and pattern. Typically, nails are placed at regular intervals along the length of the flooring material.
- Continue Installation: Progress row by row, ensuring each piece of flooring material is properly aligned and secured.
Benefits of Using a Flooring Nailer: Precision and Efficiency
Using a flooring nailer offers a range of benefits for your flooring installation project:
- Precision: Flooring nailers drive nails or staples at consistent depths and angles, resulting in a professional and polished finish.
- Efficiency: The nailer’s pneumatic power or manual operation speeds up the installation process.
- Reduced Damage: Proper nail placement minimizes the risk of damaging the surface of the flooring material.
Elevate Your Flooring Project with a Flooring Nailer
A flooring nailer is a cornerstone tool that plays a vital role in achieving a flawless and durable flooring installation. Whether you’re a professional installer or a DIY enthusiast, this precision instrument empowers you to create a sturdy and visually appealing floor with efficiency and accuracy. By understanding the types, proper usage techniques, and the benefits of a flooring nailer, you can elevate your flooring project to new heights of excellence and ensure a result that’s both impressive and long-lasting.